组件
概念
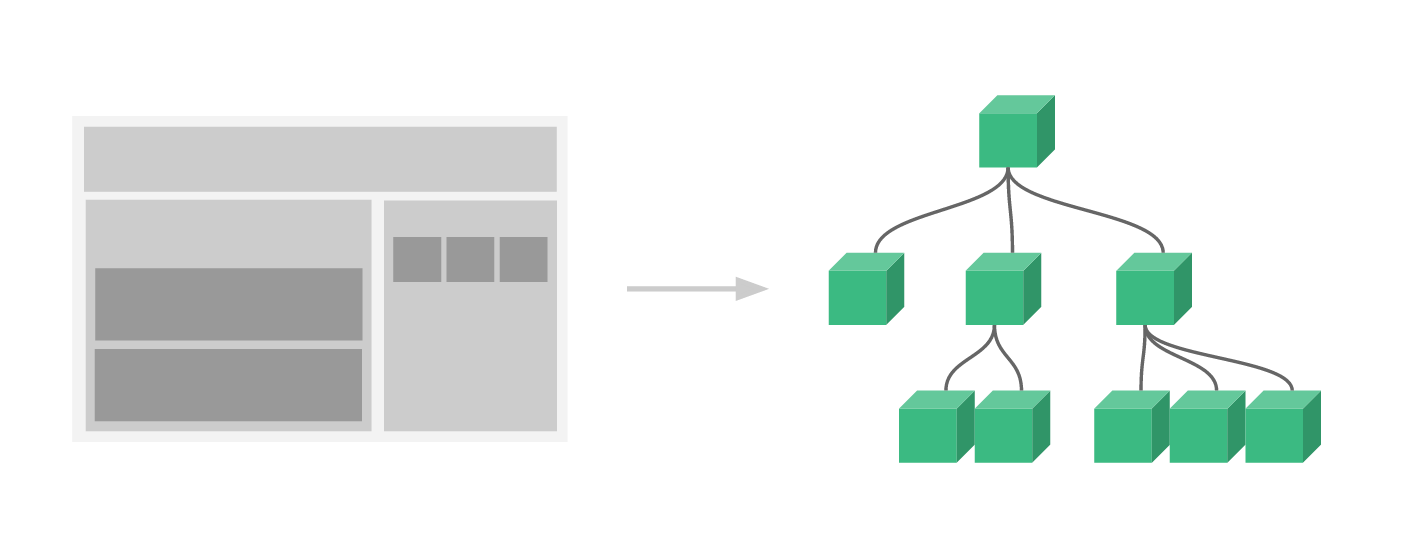
组件(Component)是Vue.js最强大的功能之一。组件可以扩展HTML元素,封装可重用的代码。根据项目需求,抽象出一些组件,每个组件里包含了展现、功能和样式。每个页面,根据自己所需,使用不同的组件来拼接页面。这种开发模式使前端页面易于扩展,且灵活性高,而且组件之间也实现了解耦。本文将详细介绍Vue组件基础用法
组件注册
组件大体有两种注册方式,全局注册 和 局部注册,我们会分别来学习。
全局组件
使用 extend 创建组件,然后注册
var com1 = Vue.extend({
 template:'<h3>Hello Component</h3>'
});
Vue.component("myCom1",com1);
不使用中间变量,即把com1的内容直接写在Vue.component里面,如:
Vue.component("mycom1",Vue.extend({
  template:'<h3>这是第一种方式</h3>'
}));
不使用 extend
Vue.component("my-com1",{
  template:'<div><h3>这是h3标签</h3><span>这是span标签</span></div>'
});
在页面上定义外部 template 元素
Vue.component("mycom1",{ template:'#temp' });<template id="temp"> <h3>这是html中的temp</h3> </template>如果是
vuecli需要在main.js中使用Vue.component('组件名',模板)注册全局组件
局部注册
var vm = new Vue({
    el:"#newBrand",
    data:{},
    components:{
        mycom1:{
            template: '<div><h3>这是局部template</h3></div>'
        }
    }
});
<template id="temp">
    <div><h3>这是局部template啦</h3></div>
</template>

var vm = new Vue({
    el:"#newBrand",
    data:{},
    components:{
        mycom1:{
            template: '#temp'
        }
    }
});
注意
在使用组件时要注意组件名的大小写。
如上面组件名写成 my-com1 形式时,在引用是必须写成 <my-com1></my-com1>
当使用 PascalCase (首字母大写命名) 定义一个组件时,你在引用这个自定义元素时两种命名法都可以使用。也就是说 <my-com1> 和 <myCom1> 都是可接受的。注意,尽管如此,直接在 DOM (即非字符串的模板) 中使用时只有 kebab-case 是有效的。
如果是全小写 (mycom1),可以直接写成 <mycom1></mycom1>
如果实在 vue-cli 项目中,全局注册的代码要写到 main.js 中。
组件中通信
通过上面的案例发现,各个组件都是相对独立的,但是在日常开发中,我们是需要不同的组件之间进行数据互相引用的。至于怎样让不同组件进行数据引用,这就是我们接下来要说的内容。
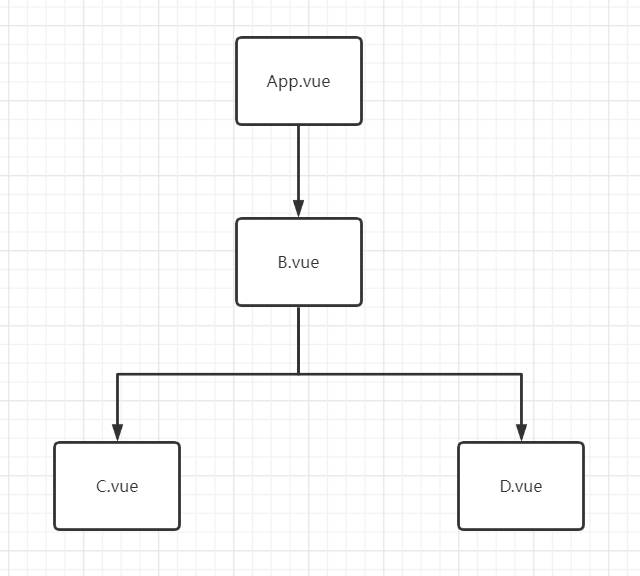
如上图所示App.vue 和 B.vue、B.vue 和 C.vue,D.vue。都是父子关系,C 和 D 是兄弟关系,A 和 C 是隔代关系。
接下来我们来说一下实现组件中传递参数的几种方式。
方式一:props/$emit
props 用来实现父组件向子组件传递数据,$emit 则是子组件向父组件传递数据
接下来我们通过一个案例来说明如何向子组件中传递值,App.vue 向子组件,Student.vue 中传值。
父组件
<template>
	<div>
		<Student name="李四" sex="女" :age="18"/>
	</div>
</template>

<script>
	import Student from './components/Student'

	export default {
		name:'App',
		components:{Student}
	}
</script>
子组件
<template>
	<div>
		<h1>{{msg}}</h1>
		<h2>学生姓名:{{name}}</h2>
		<h2>学生性别:{{sex}}</h2>
		<h2>学生年龄:{{myAge}}</h2>
	</div>
</template>

<script>
	export default {
		name:'Student',
		//简单声明接收
		props:['name','age','sex']
	}
</script>
在父组件中传递参数,在子组件中通过 props 接收,名称要保持一致,props 还有其他类型。
对数据进行类型限制:
props:{
  name:String,
  age:Number,
  sex:String
}
此时传递的参数必须和 props 的参数类型一致。
同时还可以对参数的默认值 和 必要性,进行限制
props:{
    name:{
        type:String, //name的类型是字符串
        required:true, //name是必要的
    },
    age:{
        type:Number,
        default:99 //默认值
    },
    sex:{
        type:String,
        required:true
    }
}
使用 $emit 实现子组件向父组件传递参数,这里用的是自定义事件的形式。
父组件
<template>
	<div class="app">
		<h1>{{msg}},学生姓名是:{{studentName}}</h1>
		<Student @ysmc="getStudentName"/>
	</div>
</template>

<script>
    export default {
        name:'App',
        components:{School,Student},
        data() {
            return {
                msg:'你好啊!',
                studentName:''
            }
        },
        methods: {
            getSchoolName(name){
                console.log('App收到了学校名:',name)
            }
        }
    }
</script>

<style scoped>
	.app{
		background-color: gray;
		padding: 5px;
	}
</style>
子组件
<template>
	<div class="student">
		<h2>学生姓名:{{name}}</h2>
		<h2>学生性别:{{sex}}</h2>
		<h2>当前求和为:{{number}}</h2>
		<button @click="sendStudentlName">把学生名给App</button>
	</div>
</template>

<script>
export default {
    name:'Student',
    data() {
        return {
            name:'张三',
            sex:'男',
            number:0
        }
    },
    methods: {
        add(){
            console.log('add回调被调用了')
            this.number++
        },
        sendStudentlName(){
            //触发Student组件实例身上的ysmc事件
            this.$emit('ysmc',this.name)
        }
    },
}
</script>

<style lang="less" scoped>
	.student{
		background-color: pink;
		padding: 5px;
		margin-top: 30px;
	}
</style>
点击子组件的按钮,触发sendStudentlName 函数,在函数里面通过$emit 再去触发父组件的自定义事件,同时将参数传递过去。
方式二:全局事件总线(on)
这种方法通过一个空的 Vue 实例作为全局事件总线,用它来触发事件和监听事件,巧妙而轻量实现了任何组件的通信,包括父子、兄弟、跨级。
可以定义一个空的Vue实例,我这里就是用App的实例作为事件总线。
new Vue({
	el:'#app',
	render: h => h(App),
	beforeCreate() {
		Vue.prototype.$bus = this //安装全局事件总线
	},
})
在 App.vue 调用beforeCreate钩子时,就给它绑定一个变量,值就是App实例。
然后分别创建 C、D 两个子组件,案例是 D 组件传给 C 组件数据
D组件

<template>
	<div class="c">
		<button @click="sendStudentName">把数据发送给C组件</button>
	</div>
</template>

<script>
	export default {
		name:'c',
		data() {
			return {
				name:'张三',
				sex:'男',
			}
		},
		methods: {
			sendStudentName(){
				this.$bus.$emit('hello',this.name)
			}
		},
	}
</script>
由于我们写了 Vue.prototype.$bus = this,所以就能直接通过this.$bus 获取到 全局总线,也就是 App的实例。然后通过 $emit 将数据发送出去,
<template>
	<div class="school">
		<h2>C组件:{{}}</h2>
	</div>
</template>

<script>
	export default {
		name:'C',
		data() {
			return {
				mag:''
			}
		},
		mounted() {
			// console.log('School',this)
			this.$bus.$on('hello',(data)=>{
                this.msg = data
				console.log('我是School组件,收到了数据',data)
			})
		},
		beforeDestroy() {
			this.$bus.$off('hello')
		},
	}
</script>
相同的道理拿到 App 实例后,使用 $on 监听 hello,要和$emit()第一个参数相同。因为有时不确定何时会触发,一般会在 mounted 或 created 钩子中来监听。完成后可以使用$off 停止自定义事件,停止后再点击就不执行了。